Warning: You are browsing the documentation for PrestaShop 8, which is outdated.
You might want to read an updated version of this page for the current version, PrestaShop 9. Read the updated version of this page
How to extend a grid with Javascript extensions
Introduction
Javascript grid extensions supplement grid behavior and enhance user experience. For example, most grids contains SortingExtension which provides sorting by columns functionality, BulkActionCheckboxExtension which enables interactive selection of bulk actions and so on. But the fact is that most of grids will not necessarily need all features, so by using extensions we encourage to easily add or remove grid feature while loading only necessary javascript code. In this tutorial we will learn how to use these extensions.
Getting started
To start we will need to have a plain grid already created in php side (you can find more docs about grid in The Grid component page. After following the Grid documentation directions you should now have a fully working php grid. As an example we will use a grid that display taxes items.
-
The twig template should look like this:
### src/PrestaShopBundle/Resources/views/Admin/Improve/International/Tax/index.html.twig {% block content %} <div class="row justify-content-center"> <div class="col-lg-12"> {% include '@PrestaShop/Admin/Common/Grid/grid_panel.html.twig' with {'grid': taxGrid} %} </div> </div> {% endblock %} {% block javascripts %} {{ parent() }} <script src="{{ asset('themes/default/js/bundle/pagination.js') }}"></script> {% endblock %} -
And this is how it looks in browser:
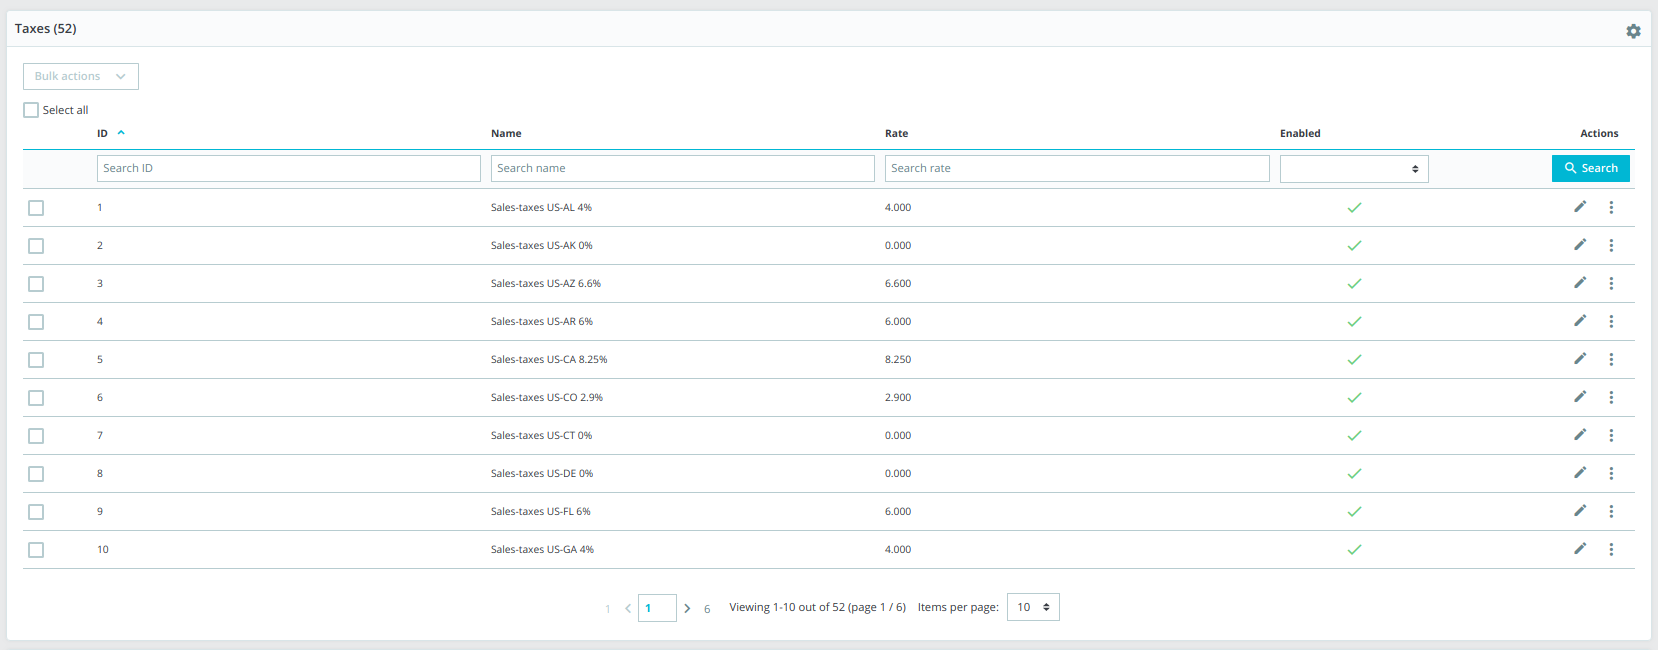
Taxes grid example
Enabling javascript
-
Create javascript file for your page. In our example we create index.js in
admin-dev/themes/new-theme/js/pages/tax/index.ts. -
Add an entry point in webpack.config.js. In our example we add an entry point in
admin-dev/themes/new-theme/.webpack/common.js.### admin-dev/themes/new-theme/.webpack/common.js module.exports = { entry: { ### adding taxes page entry point tax: './js/pages/tax', }, output: { path: path.resolve(__dirname, '../public'), filename: '[name].bundle.js', }, -
Add your compiled file path to html script tag in twig template.
### src/PrestaShopBundle/Resources/views/Admin/Improve/International/Tax/index.html.twig
// ...
{% block javascripts %}
  {{ parent() }}

  ## Adding script tag with path to compiled js file
  <script src="{{ asset('themes/new-theme/public/tax.bundle.js') }}"></script>
  <script src="{{ asset('themes/default/js/bundle/pagination.js') }}"></script>
{% endblock %}
Adding extensions
-
Import and initialize Grid component
### admin-dev/themes/new-theme/js/pages/tax/index.ts

### 1. import the grid component
import Grid from '@components/grid/grid';

const {$} = window;

$(() => {
### 2. initialize the grid component by providing grid id
  const taxGrid = new Grid('tax');
});
As you can see in example above we are importing Grid component from admin-dev/themes/new-theme/js/components/grid/grid.ts
(note that the admin-dev part might differ, as it depends on PrestaShop installation).
Next - initiating the grid component by declaring const taxGrid = new Grid('tax');. In this case the argument 'tax' represents the id of our grid.
The id provided to Grid component must be the same as in TaxGridDefinitionFactory.php
Now when you need specific extension, just import it from admin-dev/themes/new-theme/js/components/grid/extension and
add it to your grid - taxGrid.addExtension(new SortingExtension());.
In case you need more than one list per page, you can just declare another variable of another list and add extensions the same way.
### admin-dev/themes/new-theme/js/pages/tax/index.ts

import Grid from '@components/grid/grid';
### import extension
import SortingExtension from '@components/grid/extension/sorting-extension';

const {$} = window;

$(() => {
  const taxGrid = new Grid('tax');
  ### add extension to grid
  taxGrid.addExtension(new SortingExtension());
});
After adding all needed extensions, our index.js should look like this:
### admin-dev/themes/new-theme/js/pages/tax/index.ts

import Grid from '@components/grid/grid';
import SortingExtension from '@components/grid/extension/sorting-extension';
import FiltersResetExtension from '@components/grid/extension/filters-reset-extension';
import ReloadListActionExtension from '@components/grid/extension/reload-list-extension';
import ColumnTogglingExtension from '@components/grid/extension/column-toggling-extension';
import SubmitRowActionExtension from '@components/grid/extension/action/row/submit-row-action-extension';
import SubmitBulkExtension from '@components/grid/extension/submit-bulk-action-extension';
import BulkActionCheckboxExtension from '@components/grid/extension/bulk-action-checkbox-extension';
import ExportToSqlManagerExtension from '@components/grid/extension/export-to-sql-manager-extension';

const {$} = window;

$(() => {
  const taxGrid = new Grid('tax');

  taxGrid.addExtension(new ExportToSqlManagerExtension());
  taxGrid.addExtension(new ReloadListActionExtension());
  taxGrid.addExtension(new SortingExtension());
  taxGrid.addExtension(new FiltersResetExtension());
  taxGrid.addExtension(new ColumnTogglingExtension());
  taxGrid.addExtension(new SubmitRowActionExtension());
  taxGrid.addExtension(new SubmitBulkExtension());
  taxGrid.addExtension(new BulkActionCheckboxExtension());
});
The last thing to do is to run the compiler. More about compiler and npm commands here.
In our example we open command line, cd to {{Our prestashop root directory}}/admin-dev/themes/new-theme and type the following command:
npm run build(for production)
OR
npm run dev(for development)
Wait until compiling finishes and test the grid. Grid extensions are now working.