Warning: You are browsing the documentation for PrestaShop 8, which is outdated.
You might want to read an updated version of this page for the current version, PrestaShop 9. Read the updated version of this page
Adding a configuration page
HelperForm.Modules usually provide a dedicated configuration page, accessible through a “Configure” button in the Module Manager list, that allows the shop’s administrator to set up any options provided by the module.
In difference with other controllers, the content of configuration page is handled directly in the module’s main class by the getContent() public method. PrestaShop will check if this method exists and will only display the “Configure” button if this method is declared.
In the following example we will implement a minimalistic configuration page that displays a form allowing the user to edit the content of the MYMODULE_CONFIG Configuration variable.
The getContent() method
First, let’s have a look at our getContent() method:
/**
 * This method handles the module's configuration page
 * @return string The page's HTML content
 */
public function getContent()
{
    $output = '';

    // this part is executed only when the form is submitted
    if (Tools::isSubmit('submit' . $this->name)) {
        // retrieve the value set by the user
        $configValue = (string) Tools::getValue('MYMODULE_CONFIG');

        // check that the value is valid
        if (empty($configValue) || !Validate::isGenericName($configValue)) {
            // invalid value, show an error
            $output = $this->displayError($this->l('Invalid Configuration value'));
        } else {
            // value is ok, update it and display a confirmation message
            Configuration::updateValue('MYMODULE_CONFIG', $configValue);
            $output = $this->displayConfirmation($this->l('Settings updated'));
        }
    }

    // display any message, then the form
    return $output . $this->displayForm();
}
The getContent() method is called when the configuration page is loaded. Therefore, we use it to both display a form and handle the action behind that form.
Here is a step by step explanation:
Tools::isSubmit()is a PrestaShop-specific method that checks if a given form has been submitted. In this case, if the configuration form has not yet been sent, the wholeif()block is skipped and PrestaShop will only use the last line, which displays the configuration form using current values, as generated by thedisplayForm()method.Tools::getValue()is another PrestaShop-specific method that retrieves the specified parameter from either POST or GET. In this case, we retrieve the value of theMYMODULE_CONFIGform field, turn its value into a text string using(string), then store it in the$configValuevariable.- We then check that
$configValueis not empty and valid. In this case, we decided that the configuration should not accept special characters, so we useValidate::isGenericName(). TheValidateobject contains many data validation methods, among which isisGenericName(), a method that helps you keep only strings that are valid PrestaShop names – meaning, a string that does not contain special characters. - If any of these checks fail, the configuration will display an error message, indicating that the form validation failed. The
$outputvariable, which contains the final rendition of the HTML code that makes the configuration page, will begin with an error message, that we create using PrestaShop’sdisplayError()method. This method returns the correct HTML code for our need, and since that code is first in$output, this means the configuration will be displayed before any other content. - If the checks are successful, this means we can store the value in our database. The
Configuration::updateValue()method will store the new value forMYMODULE_CONFIGin the configuration database. After that, we want to add a friendly message to the user, indicating that the value has indeed been saved. To that end, we use PrestaShop’sdisplayConfirmation()method to add that message as the first data in the$outputvariable – and therefore, at the top of the page. - Finally, we use the custom
displayForm()method (explained in the next section) in order to build the form, that we want to render whether if it is submitted or not. Then we will send the resulting HTML code into$outputso that we can render the page. Note that we could have included the code fordisplayForm()right withingetContent(), but chose to separate the two for readability and separation of concerns.
This form-validation code is nothing new for PHP developers, but uses some of the PrestaShop methods that you will regularly use.
Displaying the form
The configuration form itself is displayed with the displayForm() method. Here is its code, which we are going to explain after the jump:
/**
 * Builds the configuration form
 * @return string HTML code
 */
public function displayForm()
{
    // Init Fields form array
    $form = [
        'form' => [
            'legend' => [
                'title' => $this->l('Settings'),
            ],
            'input' => [
                [
                    'type' => 'text',
                    'label' => $this->l('Configuration value'),
                    'name' => 'MYMODULE_CONFIG',
                    'size' => 20,
                    'required' => true,
                ],
            ],
            'submit' => [
                'title' => $this->l('Save'),
                'class' => 'btn btn-default pull-right',
            ],
        ],
    ];

    $helper = new HelperForm();

    // Module, token and currentIndex
    $helper->table = $this->table;
    $helper->name_controller = $this->name;
    $helper->token = Tools::getAdminTokenLite('AdminModules');
    $helper->currentIndex = AdminController::$currentIndex . '&' . http_build_query(['configure' => $this->name]);
    $helper->submit_action = 'submit' . $this->name;

    // Default language
    $helper->default_form_language = (int) Configuration::get('PS_LANG_DEFAULT');

    // Load current value into the form
    $helper->fields_value['MYMODULE_CONFIG'] = Tools::getValue('MYMODULE_CONFIG', Configuration::get('MYMODULE_CONFIG'));

    return $helper->generateForm([$form]);
}
While this might look like a huge block of code for a single form field, this block actually uses some of PrestaShop’s methods that make it easier to build forms, most notably the HelperForm object.
Let’s run down this method:
-
In preparation for the generation of the form, we create the
$formvariable, which contains the definition of the various elements (fields, labels, etc) the form will contain. From this variable, PrestaShop will render the HTML form as it is described.In this example, we define three sections (
legend,inputandsubmit) and their properties using arrays. The format is quite straightforward: thelegendandsubmitarrays simply contain the attributes to each tag, while theinputarray contains as many input elements as needed, each being in turn an array containing the necessary attributes.For instance:
'input' => [
    [
        'type' => 'text',
        'label' => $this->l('Configuration value'),
        'name' => 'MYMODULE_CONFIG',
        'size' => 20,
        'required' => true,
    ]
]
…generates the following HTML:
<div class="form-group">
    <label class="control-label col-lg-4 required">Configuration value</label>
    <div class="col-lg-8">
        <input type="text" name="MYMODULE_CONFIG" id="MYMODULE_CONFIG" class="" size="20" value="my friend" required="required">
    </div>
</div>
As you can see, PrestaShop is quite clever, and will generate all the code that is needed to obtain a useful form.
-
We then create an instance of the
HelperFormclass. -
Once all
HelperFormsettings have been configured, we generate the form based on the content of the$formvariable usinggenerateForm().
Understanding HelperForm
The HelperForm component enables you to generate standard HTML elements for the back office as well as for module configuration pages.
Our example uses several of HelperForm’s attributes; they need to be set before we can generate the form using the $form variable:
$helper->tabletakes the module’s table.$this->tableset to “modules” by default for all modules.$helper->name_controllerrequires the name of the module.$helper->tokenis the Back office CSRF token that will be appended to the form’s action.getAdminTokenLite()helps us generate one.$helper->currentIndexexpects the URL where the form will be sent to. We use the same URL as the form.$helper->submit_actionis the name of the hidden input sent with the form, which we will later use to tell if the form has been submitted.$helper->default_form_languagerequires the shop’s default language id, in case we used multi language features.$helper->fields_value[]is used to fill out the form fields.
The generateForm() method takes care of putting it all together and, as its name says, generates the form that the user will use to configure the module’s settings.
Here is the rendition of the form as it is presently written – which you can see by yourself by clicking on the “Configure” link for the module in the back office:
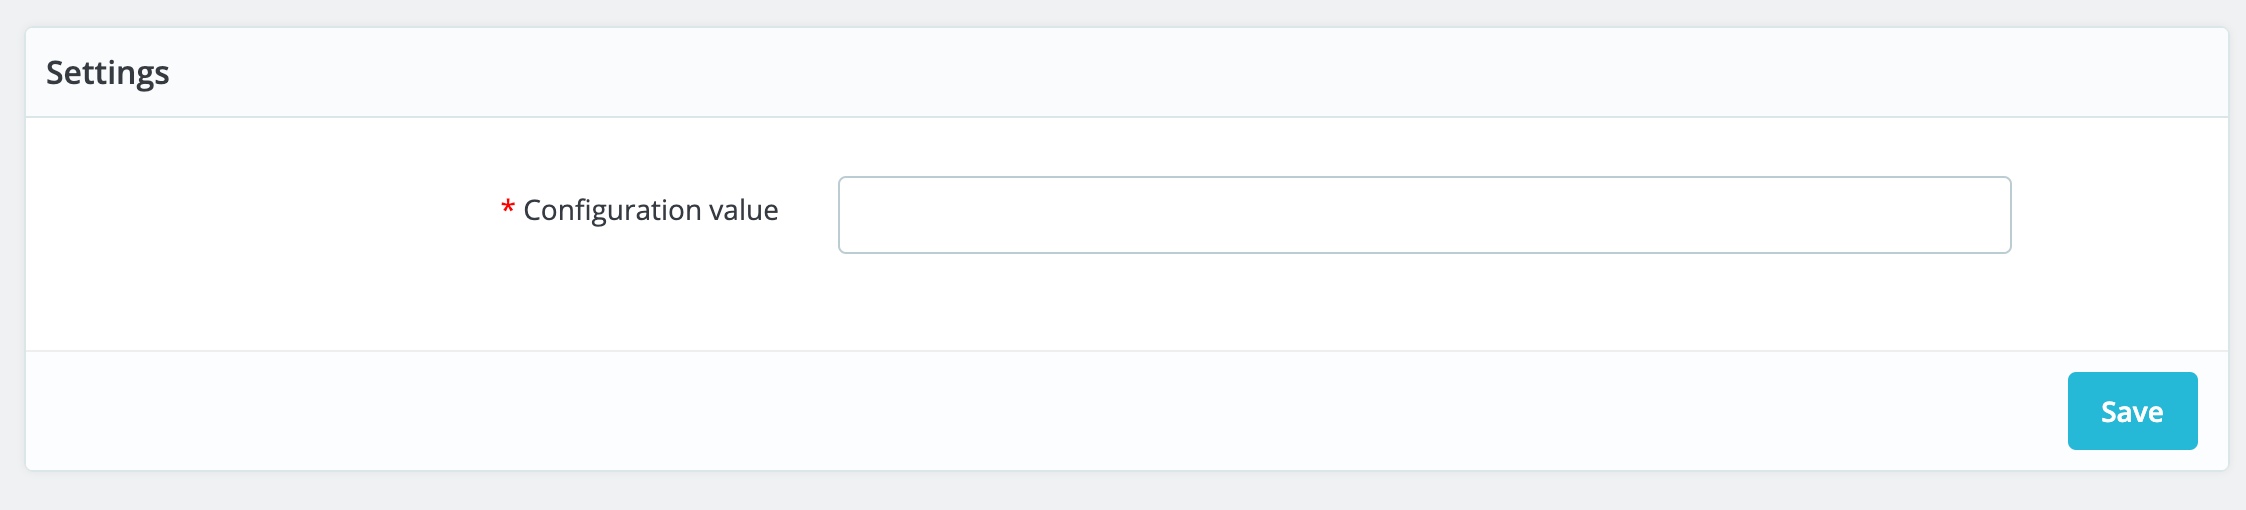
Change the value to whichever you like, click on the “Save” button, then go reload the homepage: the form is indeed updated with the new string!