Warning: You are browsing the documentation for PrestaShop 8, which is outdated.
You might want to read an updated version of this page for the current version, PrestaShop 9. Read the updated version of this page
Creating access to the Webservice
Enable the webservice
By default, the webservice feature is disabled on PrestaShop and needs to be switched on before the first use.
Via the user interface
Go in the PrestaShop back office, open the “Web service” page under the “Advanced Parameters” menu, and then choose “Yes” for the “Enable PrestaShop Webservice” option.
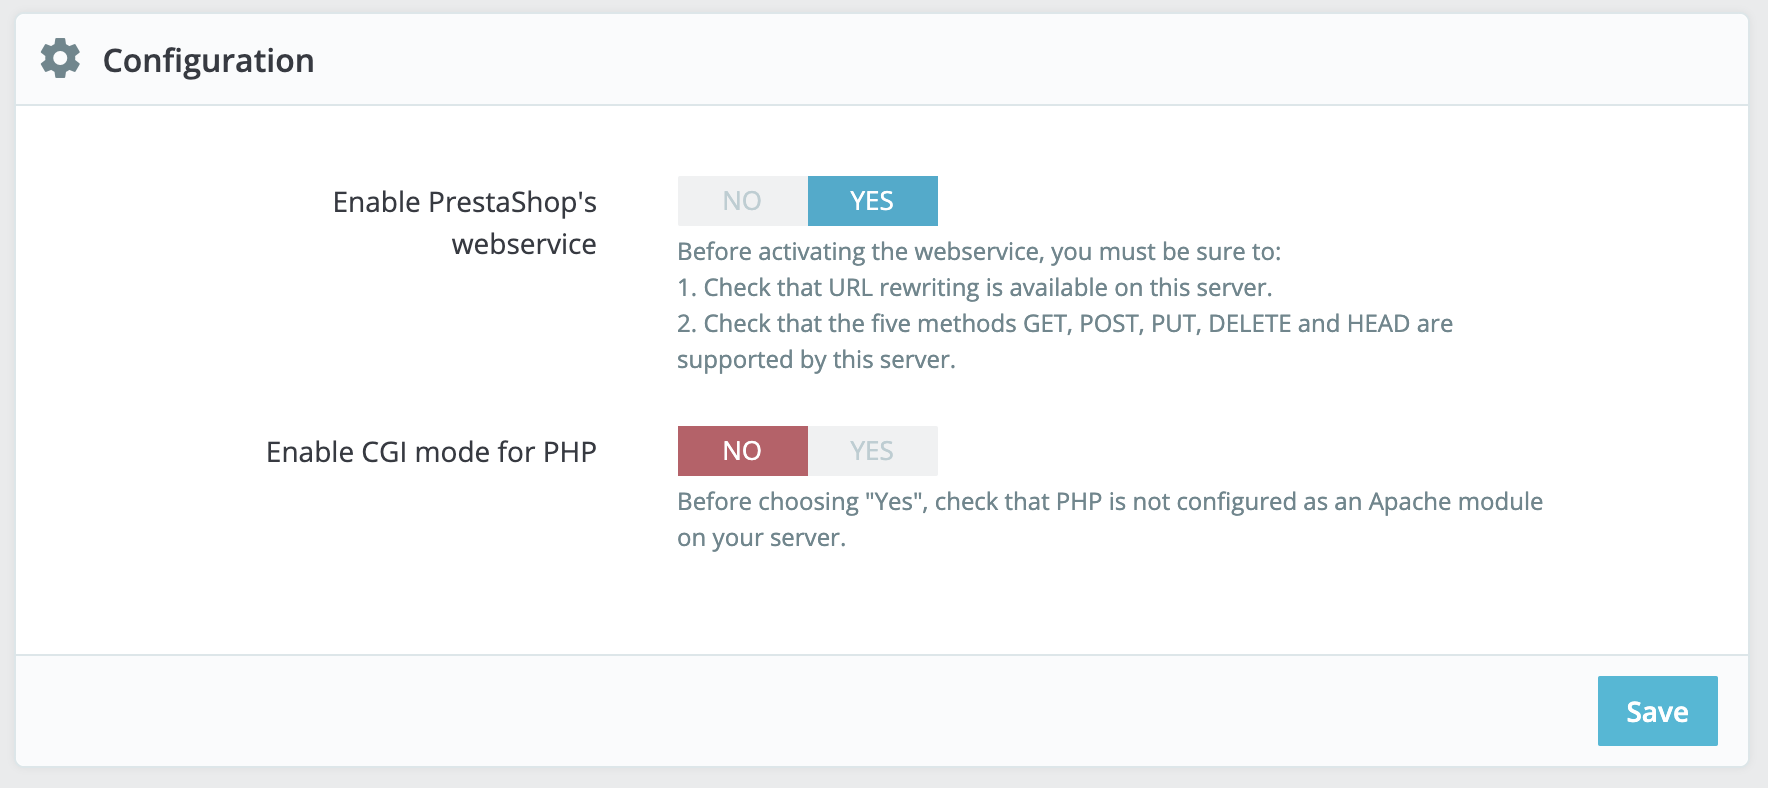
Enabling Webservice
Programmatically
The Webservice switch is stored in the configuration table of PrestaShop.
In order to enable the webservice API:
<?php
Configuration::updateValue('PS_WEBSERVICE', 1);
With the equivalent for disabling it:
<?php
Configuration::updateValue('PS_WEBSERVICE', 0);
Create an access key
Via the user interface
In order to have access to the API you need to create an access key, this will allow you to finely tune the permissions you give to the different data of your shop. You will use this key later in each call to the API. Open the “Webservice” page under the “Advanced Parameters” menu, and then click the “Add new webservice key” button to access the account configuration section.
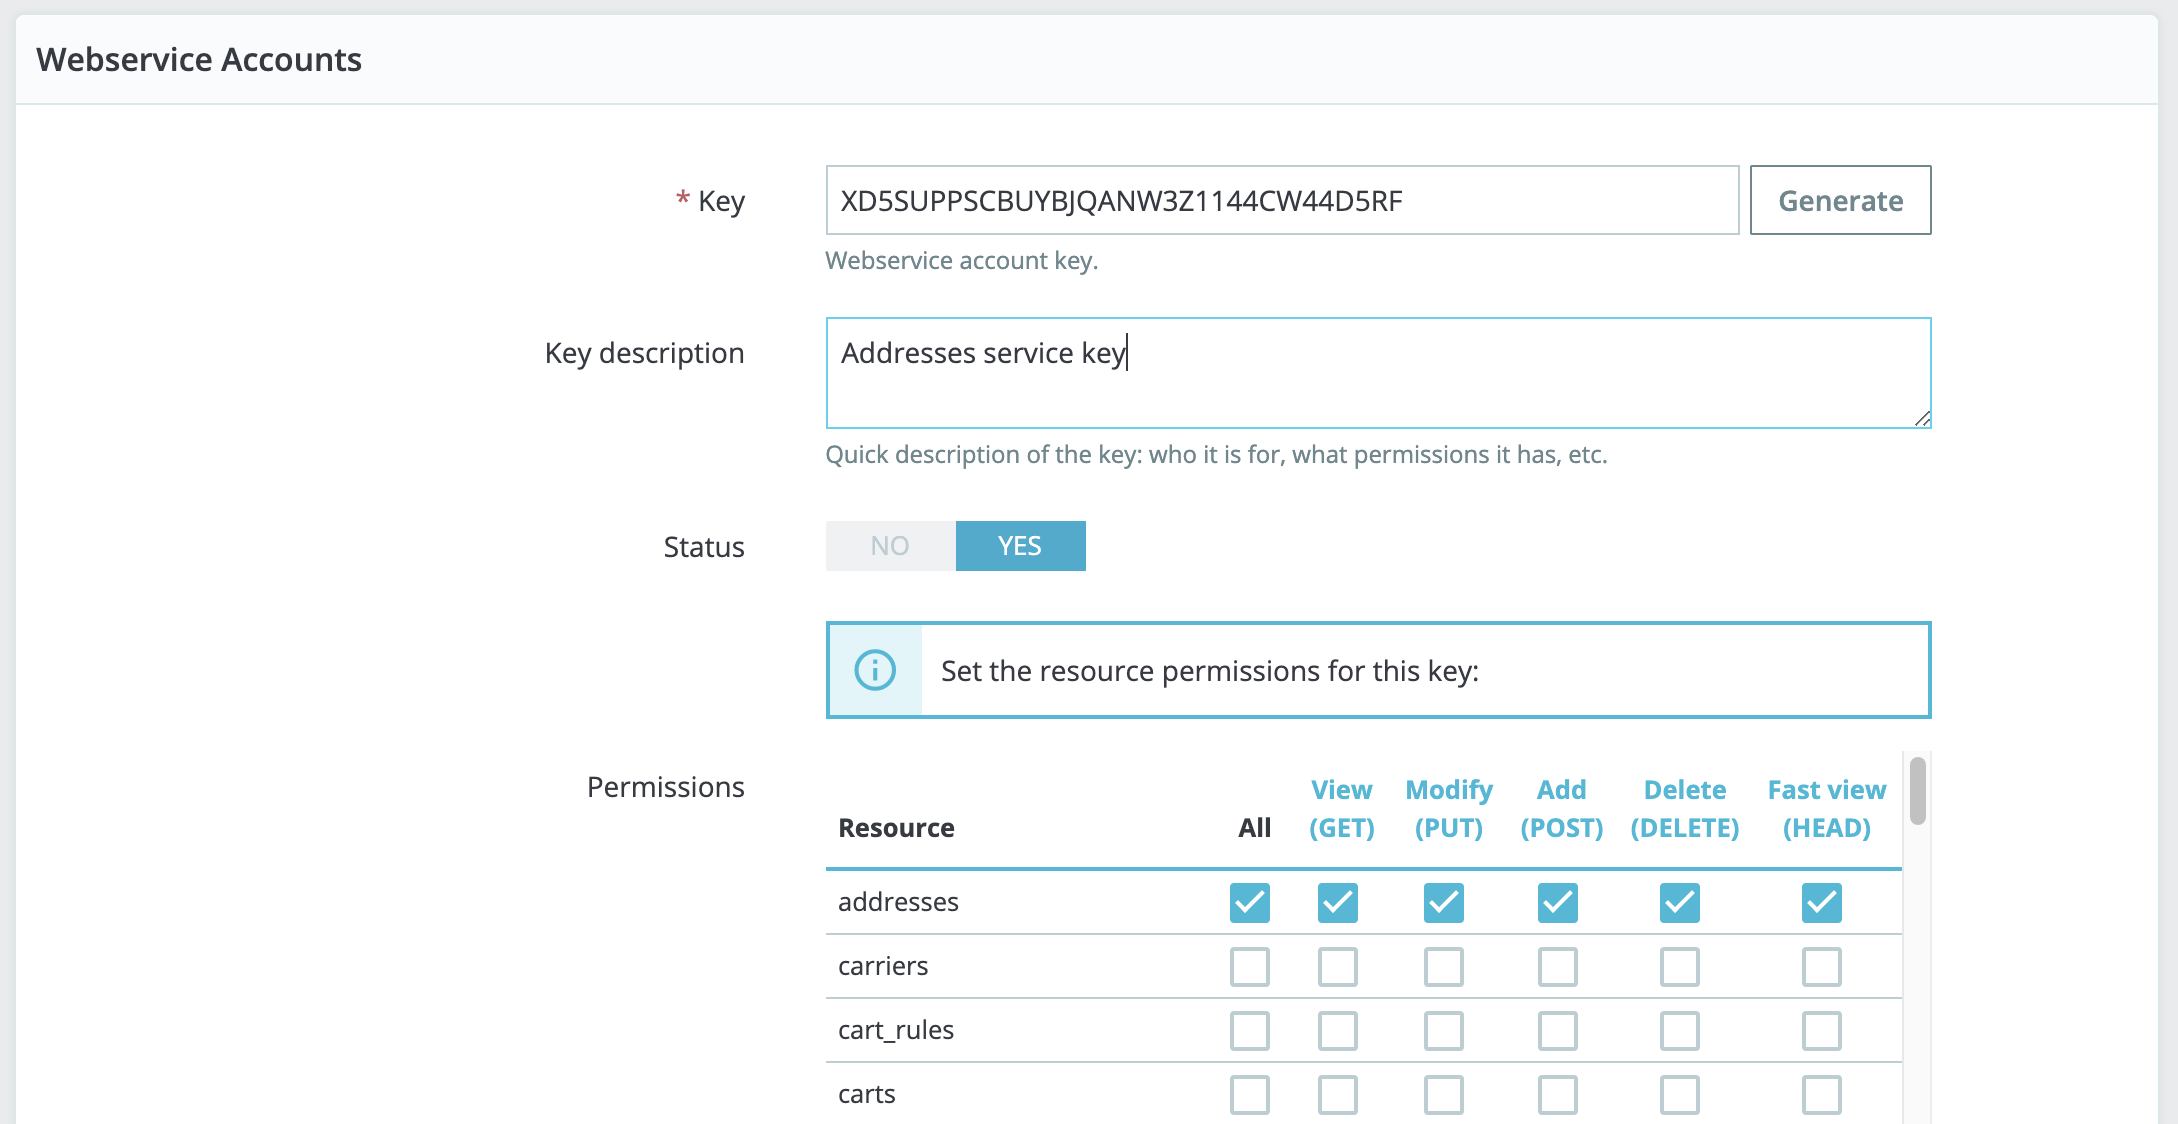
Creating an access key
Each access key is defined by this information:
- Key - The API key serves as the main identifier for the webservice account you are creating. Click the “Generate” button to get a unique authentication key. You can also create your own (which must be 32 characters long), but using a generated key prevents wrong-doers from guessing your key too easily. Using this key, you and other selected users will be able to access the webservice.
- Key description - Helps you remember who you created that key for, what are the access rights assigned to it, etc. The description is not public, but make sure to put all the keywords pertaining to the user, so that you can find their key more quickly.
- Status - You can disable any key at any time.
- Permissions - This section is very important, as it enables you to assign rights for each resource you want to make available to this key. Indeed, you might want a user to have read and write access on some resources, but only read access on others – and no access to the more important ones. In the list of permissions, the top left checkbox enables you to define all the rights for a given resource. Likewise, the checkbox at the top of each column enables you to give the select right (View, Modify, etc.) to all the resources. Make sure to only select the rights needed for the usage of that key. Do not give all the rights for all resources to any key, keep that to yours and yours only.
- Shop association - This only appears in multistore mode. It enables you to choose which of your stores the key owner should have access to.
Programatically
Creating API keys can be done with the class WebserviceKey.
<?php
$apiAccess = new WebserviceKey();
$apiAccess->key = 'GENERATE_A_COMPLEX_VALUE_WITH_32_CHARACTERS';
$apiAccess->save();
This first code allows you to pass the authentication layer. You also need access to the resources you expect to use.
We need the Api account ID in order to grant it access, and an array having the resource name as key and the array of methods allowed as value.
The available resources can be found in WebserviceRequest::getResources() (link to definition).
For instance is we want to give all permissions for customers and orders resources for the account we previously created:
<?php
$permissions = [
  'customers' => ['GET' => 1, 'POST' => 1, 'PUT' => 1, 'PATCH' => 1, 'DELETE' => 1, 'HEAD' => 1],
  'orders' => ['GET' => 1, 'POST' => 1, 'PUT' => 1, 'PATCH' => 1, 'DELETE' => 1, 'HEAD' => 1],
];

WebserviceKey::setPermissionForAccount($apiAccess->id, $permissions);
Note only the key in the nested arrays of permissions are important. We set 1 as a value in this example but it can be anything.