Warning: You are browsing the documentation for PrestaShop 8, which is outdated.
You might want to read an updated version of this page for the current version, PrestaShop 9. Read the updated version of this page
Use hooks on modern pages
You know you can already customize your PrestaShop store thanks to many hooks: the good news is that you can still use hooks like you did in the earlier versions of PrestaShop in modern pages.
Starting from PrestaShop 1.7.3, you can access the modern Services Container into your modules and so on access powerful and customizable features available in Symfony:
- Twig, the most popular templating engine;
- Swiftmailer, a feature-rich mailer;
- Doctrine ORM and Doctrine DBAL to manage your database;
- Filesystem and Finder libraries to manage all filesystem operations;
- Monolog for every logging operations;
- Serializer library for whom who need to manipulate Json and Xml formats…
Of course, you also have access to every service used by the Core of PrestaShop. This means that you can rely on all services defined in PrestaShopBundle/config/ folder, except from the ones declared in adapter folder: they will be removed at some point.
Better modules on modern pages
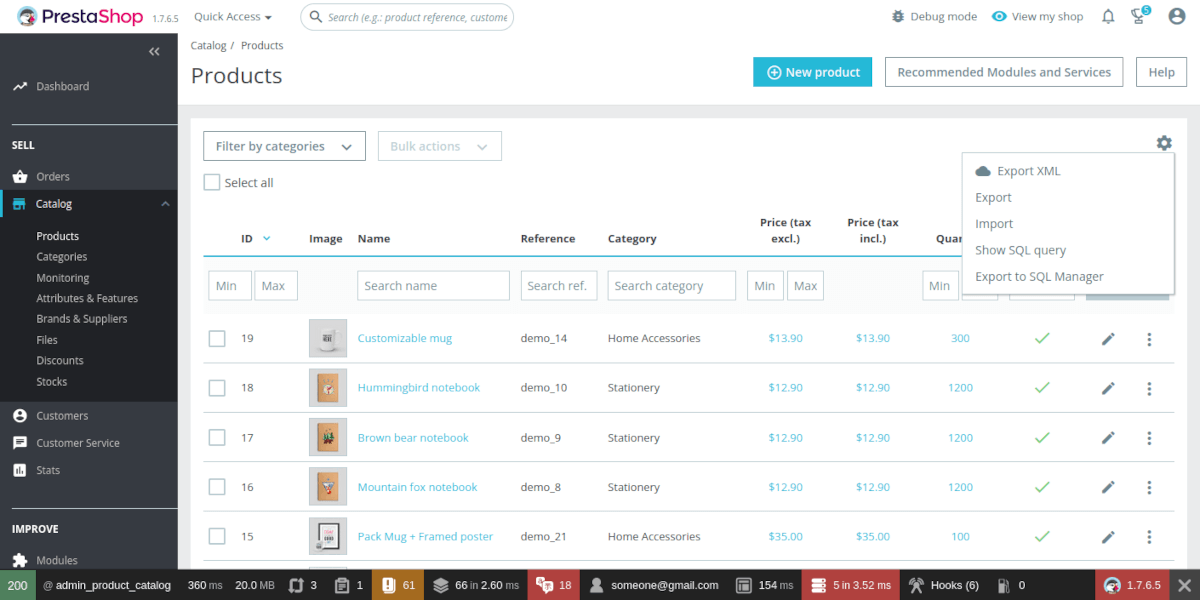
Let’s say your customer want an xml export button directly available from list of products on Product Catalog page: such a common need regarding the number of related modules in the Store.
How hard it can be to develop a module that provide this button? Well, it’s not! Let’s do this feature together.
First step: select the right hook
Accessing the Product Catalog page in debug mode we can access the list of available hooks in the debug toolbar:
- moduleRoutes
- displayBackOfficeHeader
- displayBackOfficeTop
- actionAdminControllerSetMedia
- displayDashboardToolbarTopMenu
- displayDashboardTop
- displayDashboardToolbarIcons
- displayBackOfficeFooter
- displayAdminNavBarBeforeEnd
- displayAdminAfterHeader
- actionDispatcherBefore
- actionDispatcherAfter
As we need to act on Dashboard but after the header, in the icons toolbar (with others export options) hookdisplayDashboardToolbarIcons sounds like the hook we are looking for.
Second step: create and register the Hook
Create a new module called foo and register the hook. You should end up with this kind of code in your module:
<?php
// foo.php

/* ... */

/**
 * Module installation.
 *
 * @return bool Success of the installation
 */
public function install()
{
    return parent::install() && $this->registerHook('displayDashboardToolbarIcons');
}

/**
 * Add an "XML export" action in Product Catalog page.
 *
 * @return bool Success of the installation
 */
public function hookDisplayDashboardToolbarIcons($hookParams)
{
  if ($this->isSymfonyContext() && $hookParams['route'] === 'admin_product_catalog') {
      // to be continued
  }
}
route property is only available for modern pages. To find out the route for a given page, look at the Debug toolbar.Third step: create your own product serializer
At this point, this is basic PHP code we need to produce. We need to retrieve the list of products from database, and serialize them into XML and dump into a file sent to the user.
Using Doctrine (DBAL) to retrieve data
Even if using old way to retrieve data is still valid (Product::getProducts or through the webservice), we’d like to introduce a best practice here: using a repository and get rid of the Object model. This has a lot of advantages, you rely on database instead of model and you’ll have better performances and control on your data.
<?php
// src/Repository/ProductRepository.php
namespace Foo\Repository;

use Doctrine\DBAL\Connection;

class ProductRepository
{
    /**
     * @var Connection the Database connection.
     */
    private $connection;

    /**
     * @var string the Database prefix.
     */
    private $databasePrefix;

    public function __construct(Connection $connection, $databasePrefix)
    {
        $this->connection = $connection;
        $this->databasePrefix = $databasePrefix;
    }

    /**
     * @param int $langId the lang id
     * @return array the list of products
     */
    public function findAllbyLangId(int $langId)
    {
        $prefix = $this->databasePrefix;
        $productTable = "${prefix}product";
        $productLangTable = "${prefix}product_lang";

        $query = "SELECT p.* FROM ${productTable} p LEFT JOIN ${productLangTable} pl ON (p.`id_product` = pl.`id_product`) WHERE pl.`id_lang` = :langId";
        $statement = $this->connection->prepare($query);
        $statement->bindValue('langId', $langId);
        $statement->execute();

        return $statement->fetchAll();
    }
}
And declare your repository as a service:
# modules/foo/config/services.yml

services:
    product_repository:
        class: Foo\Repository\ProductRepository
        arguments: ['@doctrine.dbal.default_connection', '%database_prefix%']
        public: true
Prestashop automatically checks if modules have a config/services.yml file and will autoload it for you. In order to force Prestashop to parse the file, you need to clear the cache:
./bin/console cache:clear --no-warmup
If PrestaShop fails to load files automatically, you can generate the autoloader with Composer. This will create a vendor directory with a Composer-based autoloader inside.
You can now use it in your module (and everywhere in PrestaShop modern pages!):
<?php
// foo.php

/* ... */
/**
 * Get the list of products for a specific lang.
 */
public function hookDisplayDashboardToolbarIcons($hookParams)
{
    if ($this->isSymfonyContext() && $hookParams['route'] === 'admin_product_catalog') {
        $products = $this->get('product_repository')->findAllByLangId(1);
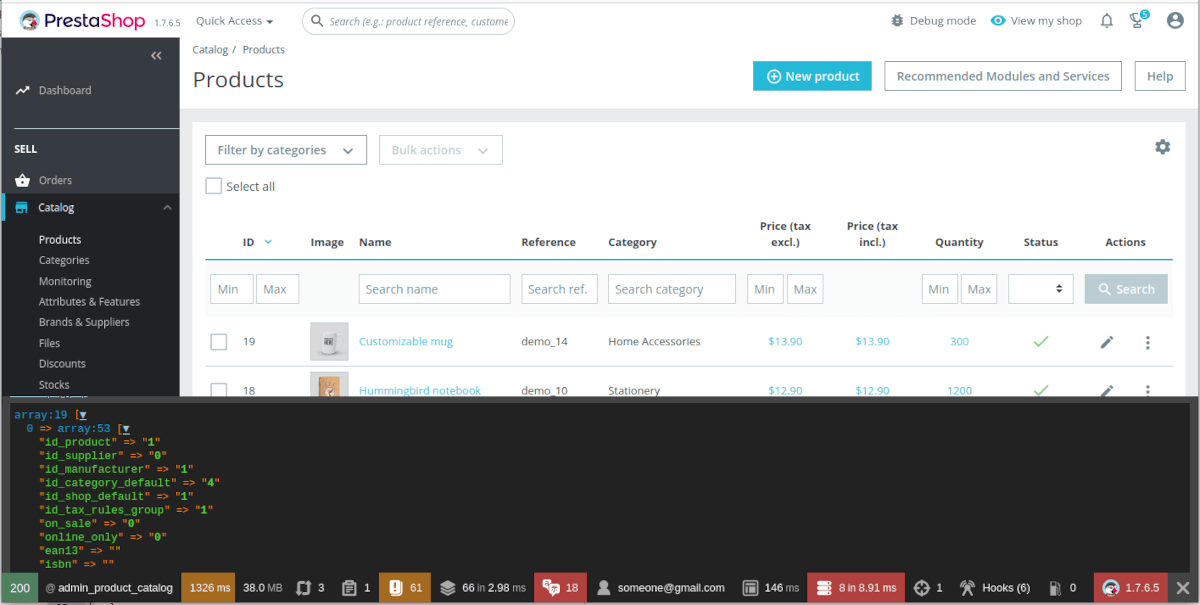
        dump($products);
    }
}
In Product Catalog Page you should see the list of Products in debug toolbar in “Dump” section:

Using the Symfony components to create an XML export file
Now we retrieve the product list from our module and that we are able to display the information into the back office, we could already create our XML file with raw PHP. Let’s see how we can do it using the components provided by Symfony “out of box”.
<?php
// foo.php

/* ... */
/**
 * Creates an XML file with list of products in "upload" folder.
 *
 * @return bool Success of the installation
 */
public function hookDisplayDashboardToolbarIcons($hookParams)
{
    if ($this->isSymfonyContext() && $hookParams['route'] === 'admin_product_catalog') {
        $products = $this->get('product_repository')->findAllByLangId(1);

        $productsXml = $this->get('serializer')->serialize(
            $products,
            'xml',
            [
                'xml_root_node_name' => 'products',
                'xml_format_output' => true,
            ]
        );
        $this->get('filesystem')->dumpFile(_PS_UPLOAD_DIR_ . 'products.xml', $productsXml);
    }
}
serializer service is not enabled in PrestaShop 1.7.3 but will be enabled in 1.7.4. If you really want to enable it in 1.7.3, uncomment the following configuration line in your services.yml file of your Shop.# app/config/services.yml
services:
# Enables the serializer
framework:
serializer: { enable_annotations: true }
Render the icon using Twig templating engine
Now we have serialized our products, it’s time to render an Icon link with the file to download!
We could (of course) use Smarty to render a template, but it’s a chance to discover Twig which is also available as a service. First, let’s refactor and finalize our hook call:
<?php
/**
 * Make products export in XML.
 *
 * @param $params array
 */
public function hookDisplayDashboardToolbarIcons($params)
{
    if ($this->isSymfonyContext() && $params['route'] === 'admin_product_catalog') {
        $products = $this->get('product_repository')->findAllByLangId(1);

        $productsXml = $this->get('serializer')->serialize(
            $products,
            'xml',
            [
                'xml_root_node_name' => 'products',
                'xml_format_output' => true,
            ]
        );
        $this->get('filesystem')->dumpFile(_PS_UPLOAD_DIR_ . 'products.xml', $productsXml);

        return $this->get('twig')->render('@Modules/Foo/views/download_link.twig', [
            'filepath' => _PS_BASE_URL_ . '/upload/' . 'products.xml',
        ]);
    }
}
And now, the template:
{# in Foo/views/download_link.twig #}
<a id="desc-product-export" class="dropdown-item" href="{{ filepath }}" target="_blank">
    <i class="material-icons">cloud</i>{{ "Export XML"|trans({}, 'Module.Foo') }}
</a>

And “voila!”, the module could be of course improved with so many features, adding filters on export for instance, using the request hook parameter and updating the Product repository.